|
|
Training and Access |
current-staff |
change, request, design |
-
How do I log in to the CMS?
- Visit the CMS login page.
- You may be automatically logged in if you have previously logged into the CMS or another QUB service. If this is the case, you do not need to follow steps 2-3.
- If prompted, enter your QUB credentials.
- If prompted, complete the Multi-factor authentication (MFA) steps.
- Upon successful completion of steps 1-3, you will be logged in and redirected to the CMS welcome screen.
Note: Please ensure a CMS profile has been set up for you, otherwise you will not be logged in to the CMS. You can learn more on accessing the system on our guidance page.
Share
|
Training and Access |
current-staff |
logging in, login |
|
|
Training and Access |
current-staff |
logging in, login, active directory, account |
|
|
Training and Access |
current-staff |
training, register |
-
Where are the CMS Training Videos?
Our online training materials are a series of instructional pages which have been organised into two main categories:
To learn how to use the system begin with the common tasks videos, as these are the things you'll need to know to be able to maintain your site, for example, modifying existing content and adding different types of links.
The content types are a list of all the layouts you can choose from - each web page being populated using different blocks of content with each block using a specific content type of your choice.
Share
|
Training and Access |
current-staff |
training, videos |
|
|
Training and Access |
current-staff |
request, new, website |
|
|
Training and Access |
current-staff |
blog, wordpress |
-
How do I create a Section in the Web CMS?
When viewing the Site Structure, you'll see that it is made up of folders and subfolders. These are the Sections of your site(s) and they are the containers for your content.
In the Site Structure, pick the location of your new Section, go to the Section Action Menu and select Create New Section. The Section configuration screen will appear. Follow the guidance for adding a Section Name as well as Output URI and Metadata Information to a webpage.
Share
|
Section and Content Tasks |
|
section, name, url |
-
How do I add an Output URI and Metadata Information to my webpage?
For SEO purposes, it is important to give your sections relevant names and then assign key sections in your site Output URIs which follow the correct convention. The correct convention when entering a value into the Output URI field is to use a lowercase and hyphenated version of the section title. For example, the following site is located in the Schools Channel:
Section Name: Queen's Business School
Output URI: queens-business-school
This means that the published web address in the above example will be:
https://www.qub.ac.uk/schools/queens-business-school/
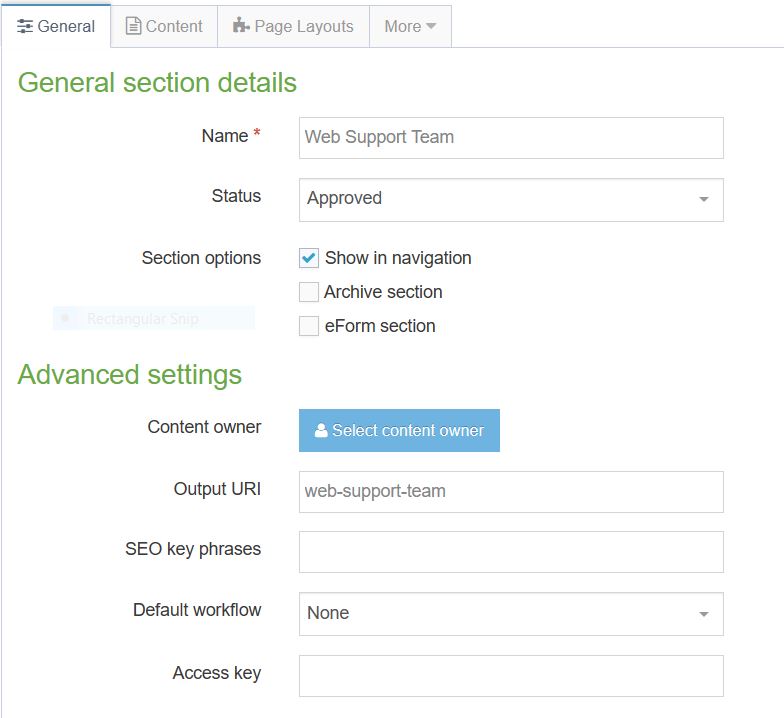
- From the Actions menu, choose Create Section
- In the Name field, enter a relevant section name. This will become the published page title.
- In the Output URI field, enter a lowercase, hyphenated version of the section name. This will become the final part of the published web address.
It is important to note that it is best to add an Output URI when you are first creating a new section. You can add an Output URI at any time, but adding an Output URI to alter the URL on a section that has been live for a while will affect any Google links, external links or bookmarks pointing to the old URL.
Add a metadata description to key sections in your site. This description should be a meaningful and concise sentence which summarises what the site is about. A search engine then presents this description to the user in its search results. It should be between 120-158 characters in length.
- Click on the Actions menu beside the relevant section and choose Edit Section
- Click the More tab and choose Metadata
- In the Description field type a meaningful description of your site. For example:
'Queen's Management School is one of the top business schools in the UK and Ireland and prides itself on offering a world-class range of undergraduate and postgraduate degree programmes in Accounting, Economics, Finance and Management.'
Add metadata keywords to key sections in your site. Keywords should accurately reflect the content of the site or page.
- Click on the Actions menu beside the relevant section and choose Edit Section
- Click the More tab and choose Metadata
- In the Keywords field type a list of meaningful keywords highlighting key aspects of your site. For example:
'Queen's University, Management School, Business School, UK, Belfast, Top Business School, Business degrees, Accounting degrees, management degrees, finance degrees, QUB Management School'
Don't forget to click Save Changes after making these updates.
The location of the Output URI field under the General Tab, using the correct convention
The location of the Description and Keywords fields under the Metadata Tab

Share
|
Section and Content Tasks |
current-staff |
|
-
What is the correct naming convention for files and images?
What is the Correct Naming Convention for Files and Images?
All documents (e.g., PDFs, Word documents, Excel documents, etc.) and image files must have the correct filename BEFORE they are uploaded to the Media Library and File Stores. This means they must have the guidance below applied whilst the assets are held on your computer or within the SharePoint site for your business area.
The guidance is as follows:
- Use only lowercase letters (a to z), numerals (0-9) and hyphens (-).
- Do not use spaces. Instead, use hyphens to separate words.
- Do not use special characters (e.g., £, %, &, á) or underscores.
Correct
- annual-report-and-accounts-2023-24.pdf
- undergraduate-prospectus.pdf
- application-form.docx
- lanyon-building-at-night.jpg
- queens-business-school-student-hub.jpg
Incorrect
- Annual Report & Accounts 2023-24.pdf
- UG_prospectus.pdf
- Application Form.docx
- Lanyon Building.jpg
- Queen's_Business_School & student Hub.jpg
The Web Support Team reserves the right to change (or request changes to) filenames if they do not meet digital best practice.
You also need to ensure that all files and images that are uploaded to the CMS are accessible and have been optimised for use on the web.
The following resources will help you:
Share
|
Section and Content Tasks |
current-staff |
filenames, naming convention, file uploads, image names |
|
|
Section and Content Tasks |
current-staff |
table, website, mobile, responsive, data |
-
What is the guidance on embedding feeds from the X platform on a website?
It is our recommendation that Feeds from the X platform are not embedded within websites published via the Web CMS. There are two main reasons behind this recommendation which are as follows:
- Visitors to your website will not be able to see any of the content within the embed unless they are logged into their own account on the X platform. They will instead see a message such as 'Nothing to see here' until they log into their X account and then visit your website.
- The point of having an account on the X platform is to drive traffic to your website. It should be used to promote events, news articles and other information via links to the appropriate page(s) on your website.
We would recommend adding a link out to your social media profiles using appropriate icons on your website. Please log a call via the IT Service Desk if you require help adding or amending social media links on your website.
Share
|
Section and Content Tasks |
current-staff |
twitter, x, embed, social, media |
-
Why is the orientation of my image wrong on my website?
The web browser shows the correct orientation of the image when the photo was taken. This could be upside-down if the camera was held upside down when the image was taken. You will have to resave the image in the correct orientation.
To do this, you can open your image in an image editor and save the image in your preferred orientation. At this point, you can then upload your image to CMS.
Note: The CMS currently ignores the default orientation setting, so the image may look correct in the CMS thumbnail preview but look incorrect when published live.
Share
|
Section and Content Tasks |
current-staff |
images, image orientation, web site |
|
|
Accessibility |
current-staff |
publish, cms, transfer |
|
|
Accessibility |
|
|
|
|
Accessibility |
|
|
|
|
Accessibility |
|
|
|
|
Accessibility |
|
|
-
What is an iFrame-Embedded Content?
An iFrame is a frame or container within your web page which allows you to include/embed a piece of content from another source. Typically on Queen's webpages, these other sources are Mediasite videos, Youtube videos and MS Forms.
The snippet of code that is embedded just needs a title to make it meaningful for screenreaders and other assistive technologies. You, as the content editor, are responsible for adding this title to the embed code.
Currently, there are three content types that you should use to embed content. Each of these allow you to edit the code to insert a title:
- DTP - Video Embed (for Videos)
- Video - Video with Text (for Videos)
- DTP - Code Only (for Forms)
View our video on how to edit iFrame code
Share
|
Accessibility |
|
|
-
I entered the title code for an iFrame and saved the content but it has disappeared. Why?
The only 3 content types that remember (save) the title code you insert are:
- DTP - Video Embed (for Videos)
- Video - Video with Text (for Videos)
- DTP - Code Only (for Forms)
Any other content types on your website that have existing embedded code will not save any additional code you enter. For example, if you have embedded a video from Mediasite or Youtube into a 'DTP-General Content' layout, when you click Save Changes, the code is stripped out of the HTML and is not saved. Only certain content types are built to retain any additional code that is inserted. This is why your iFrame title has disappeared.
To solve this, you will need create a new block of content on the web page using one of the three content types listed above, embed the relevant code, add a title and then preview, save and approve the content. You will also need to remove the existing embedded code from the other content type.
View our video on how to edit iFrame code
Share
|
Accessibility |
|
|
-
Will the Siteimprove Plugin work for a site which hasn't been published yet?
Yes, it will work for any webpage you preview from within the Web CMS. The webpage/site does not have to be published for the Siteimprove plugin to check it for any accessibility errors.
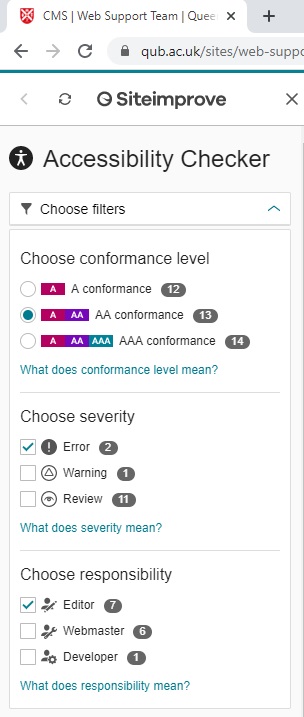
Make sure you have selected the following filters in the plugin:
- Choose conformance level: A AA AA conformance (not AAA conformance)
- Choose severity: Error (not Warning or Review)
- Choose responsibility: Editor (not Webmaster or Developer)
Share
|
Accessibility |
|
|
|
|
Accessibility |
|
|
|
|
Accessibility |
|
|
|
|
Accessibility |
|
|
|
|
Accessibility |
|
|
|
|
Accessibility |
|
|
-
I fixed my site's accessibility errors, but they are not showing as resolved in the dashboard report. Why?
This will depend on two things: when you made the changes and when the latest Siteimprove crawl occurred. Siteimprove crawls defined websites every seven days, therefore the dashboard report will take some time to update and reflect any changes you have made to your site.
You can login and view your Siteimprove Dashboard at any time, but the date of the next crawl is when your latest results will be displayed.
What you can also do is check your site using the Siteimprove Chrome Plugin, which should show your issues as fixed, even though this is not yet reflected in your Siteimprove dashboard report.
Share
|
Accessibility |
|
|
-
Where should I store website assets?
Use SharePoint to Manage Files
Store and organise all materials for website content (e.g., news, events, photos, documents) on your area's SharePoint site for easy access and management.
Avoid Using the Web CMS as a Repository
Do not use the Web CMS for storing important assets. Instead, use SharePoint to maintain, manage, retain, and archive business-related materials.
What to Store in the Web CMS
Only the final versions of assets should be stored in the Web CMS. Ensure that all content adheres to the provided guidelines before uploading.
Images/Photos:
- Source responsibly and comply with copyright laws
- Prepare according to our guidance
- Resize and optimize
- Use correct filenames (File names need to be correct BEFORE uploading to the Web CMS)
- Follow accessibility guidelines
Documents:
- Upload only final, approved versions
- Ensure accessibility standards are met
- Optimize for web
- Use correct filenames (File names need to be correct BEFORE uploading to the Web CMS)
Note: Non-compliant media will be removed from the Web CMS until corrected.
Share
|
Content and Media Review |
current-staff |
|
-
How often should I review a website?
We strongly recommend that website owners/editors establish a practice of frequently reviewing the website(s), section(s), and media for which they are responsible within the Web CMS. This review process should be conducted at least quarterly each year the website is live.
Share
|
Content and Media Review |
current-staff |
review,timescale,frequency |
|
|
Content and Media Review |
current-staff |
review,delete,pending |
-
How should I review Pending Sections?
Pending sections will not be published live as part of your website. They may include outdated information, work that was started but never completed, or old content.
General Advice
If a section and its content are no longer needed, delete them from the system.
Review Checklist:
- Preview the Section: Click 'Preview' to view the content in your browser and quickly determine if the content is outdated.
- Last Modified Date: If the content hasn't been updated in the last six months and there's no plan for future use, it’s likely unnecessary.
- Content History: View the 'History' tab for content creation and modification details. If the creator no longer works on the website, the content is probably redundant.
- Obtain Permission: If unsure about deleting content, consult the website owner for a decision.
- Archive: For content related to core events or institutional memory, ensure it's centrally stored (e.g., SharePoint/Intranet). If you have any queries relating to content marked as archive, please log a support request via the IT Service Desk.
Share
|
Content and Media Review |
current-staff |
pending,review |
-
How should I review Archived sections?
Reviewing Archived sections follows the same steps as reviewing pending sections. Archived sections have a different icon in your Site Structure to set them apart from standard folders. Refer to the Terminal Four documentation to understand section icons.
General Advice
If an archived section is over a year old, it is typically no longer needed and can be deleted along with associated media.
Review Process:
- Preview: Check the section to determine its age and relevance.
- Permission: Obtain permission if unsure about deletion.
- Contact Support: For further advice, log a support request via the IT Service Desk.
Share
|
Content and Media Review |
current-staff |
|
-
How should I review Approved sections?
Importance of Content Review
Content on your website shapes audience perception of your area and the University. It is therefore very important that new and existing content is given careful consideration, and frequently reviewed to help ensure accuracy and relevance.
Approved sections will publish live if they contain at least one approved piece of content. However, not all approved sections need to remain live.
Review Recommendations
We recommend that you review your live website and Site Structure in parallel and consider the following:
- Check for 'hidden from navigation' sections and assess their relevance. Refer to the Terminal Four documentation to understand section icons.
- Remove outdated content and information such as past events, news, and projects.
- Merge or remove redundant content to enhance user experience.
- Fix broken links, replace missing media, or ensure the media in use is the latest version.
- Ensure all content meets accessibility guidelines. Content can be checked using the Siteimprove accessibility extension for Chrome.
- Add and review metadata for core pages to improve SEO.
If you require any advice or have questions relating to the restructuring or removal of approved content please log a support request via the IT Service Desk.
Share
|
Content and Media Review |
current-staff |
|
-
How do I request a content report for my website?
We can provide website owners / editors with content reports in Microsoft Excel format for the website(s) and section(s) they are responsible for. The report will contain the following information:
- Section pathway
- Content name
- Content type used
- Last modified date
- Content Status
A content report can be requested via the IT Service Desk. When submitting a ticket requesting a content report, please add 'Web CMS - Content Report Request' to the Summary field. Then in the description field, either provide the full live URL of your website, or the pathway within the Web CMS.
Request a content report for your website(s) or section(s) via the IT Service Desk.
Share
|
Content and Media Review |
current-staff |
content,report |
-
What is the recommended process for reviewing media?
Post-Content Review
After reviewing website content, the next step is to review the media stored in your Site Structure and Media Library. Documents and media should be Included in your quarterly website review.
File Store(s)
- Most websites have a 'File Store' section for uploading and storing documents.
- Users can link to these documents for visitors to download and view offline.
- It is important to review and delete old files from the File Store when they are no longer needed, especially if the content linking to them has been deleted.
- Website owners/editors can often overlook that documents in the File Store need deleted if not in use which will mean they continue to publish to the live website.
- Read our guidance on reviewing File Stores.
Media Library
- Every website or core section has a folder in the Media Library for managing media.
- Website owners/editors should regularly review and remove unnecessary documents and imagery from the Media Library.
- Read our guidance on reviewing folders in the Media Library.
Share
|
Content and Media Review |
current-staff |
|
-
How do I request a media report for my website?
We can provide website owners / editors with media reports in Microsoft Excel format for folders in the Media Library associated with website(s) and section(s) they are responsible for. The report will contain the following information:
- Media ID number
- Media name
- Media category
- Media type
- Usage information
- Content usage name
A content report can be requested via the IT Service Desk. When submitting a ticket requesting a media report, please add 'Web CMS - Media Report Request' to the Summary field. Then in the description field, either provide the full live URL of your website, or the pathway within the Web CMS.
Request a media report for your website(s) or section(s) via the IT Service Desk.
Share
|
Content and Media Review |
current-staff |
media,report |
-
How should I review a File Store?
File Store vs. Media Library
Whilst a File Store can be set up for storing documents, we recommend storing website-related media, including documents, in the Media Library.
General Advice
If a document in the File Store is over a year old, not currently used in any content, and there is no plan to use it going forward, then it should be deleted. If any documents need to be retained, then please follow our guidance on storing website assets.
Request a Content Report
- Request a content report for the File Store or the entire website, including the File Store.
- Use the report, sorted by 'last modified' date, to identify and delete unnecessary content in the system.
- You can request a content report by following this guidance.
Review and Delete File Store Content
Please Note
If you require a copy of a file before deleting from the File Store, you can open each content item and click on the 'Download' button. At present there is no option to bulk download files from the File Store.
- Visual Review
- Website owners/editors can visually review File Store content and make a decision as to whether the document is required based on the file name and modification dates.
- Expand the site hierarchy, navigate to the 'File Store' section. Note: The File Store section may be named slightly differently i.e. 'Filestore', 'filestore', 'File Store'.
- Begin reviewing the content in the File Store section.
- Individual File Deletion
- Bulk File Deletion
- In the Section Content tab, select each checkbox for each content item you want to delete, click on the 'Bulk Actions' menu in the section menu and select the 'Bulk delete' option.
- Or, if you want to delete all files in view, select the first checkbox in the checkbox column, click on the 'Bulk Actions' menu in the section menu and select the 'Bulk delete' option.
- View this guide for bulk deleting content items from the File Store.
If you have any queries or require any assistance with any of the above, please log a support request via the IT Service Desk.
Share
|
Content and Media Review |
current-staff |
|
-
How should I review folders in the Media Library?
Every website or core website section will have a corresponding folder within the Media Library. It is the website owners / editors responsibility to review and maintain the media content items in these folders on a quarterly basis.
As a first step, it is recommended that website owners / editors identify and review media content items that are more than a year old as part of a review. This information can be obtained via a Media Report and / or with a visual review.
Request a Media Report
Visual Review
Website owners / editors can perform a visual review of the media contained in the Media Library folders associated with your website(s). They can check the 'Last modified' column to determine the age of media files.
General Advice
If a Media Library file is over a year old, not currently used in any content, and there is no plan to use that media, then it should be deleted. If media files need to be retained, then please download them and follow our guidance for storing website assets.
A Few Notes to Consider
- We would advise that you do not delete the media library folder containing the content items and instead work your way through reviewing the media within those folders. This is because some of the media may be in use as outlined as part of the review steps below.
- There is no option to bulk download files from the Media Library.
Accessing the Media Library
- Go to the 'Media Library' via the Content Section of the Main Menu.
- Review the media content items in all top-level and sub-folders.
- You can use a Media Report to prioritize files/folders for review.
Organise Content Items for Review
In each Media Library folder, you can click on the 'Last modified' column and this will re-organise media assets in the folder to either ascending order (oldest to newest) or descending order (newest to oldest).
Downloading Content Items
If you require a copy of a media content item before deleting from the Media Library, you can do this by clicking on the 'Actions' menu beside each media content item and clicking on the 'Download' option.
Deleting Content Items
Following the review of a media library folder, if you do not require some or all of the assets contained in the folder, they should be deleted. There are a few options for deleting content items from the Media Library.
- Individual Deletion
- Within each Media Library folder, every content item has an 'Actions' menu associated with it. Click on the 'Actions' menu and then the 'Delete' option.
- To confirm deletion, a modal dialogue box will load, click on the 'Delete' option.
- The status of the content item will update and change from approved to 'Inactive'.
- You can view this guide for deleting individual Media Content Items.
- Bulk Deletion
- Within each Media Library folder, select each checkbox for each content item you want to delete, click on the 'Bulk Actions' menu in the Media Library menu and select the 'Delete' option.
- Or, if you want to delete all files in view, select the first checkbox in the checkbox column, click on the 'Bulk Actions' menu and select the 'Delete' option.
- To confirm deletion, a modal dialogue box will load, click on the 'Delete' option.
- You can view this guide for bulk deleting Media Content Items.
- Content Item is in Use
- If one or multiple files you have selected to delete are currently in use, a modal dialogue box will appear and provide information about the content the file is currently used in.
- If the content is old, no longer publishing, or the file is not accurate, it should be deleted.
- You can view this guide for Media Content Items that are in use.
If you have any queries or require any assistance with any of the above, please log a support request via the IT Service Desk.
Share
|
Content and Media Review |
current-staff |
media,library,report |
-
How often does my site publish?
The following table shows the publish and transfer schedule of the main channels.
The publish time is the time you need to have approved your changes by, in order to make that publish cycle.
The transfer time is the time, later in the same publish cycle, when the approved changes will transfer and appear on the live site.
| Channel Name |
Publish Time |
Transfer Time |
| Home |
:12 Hourly (10:12, 11:12) |
:40 Hourly (10:40, 11:40). |
| Schools |
:22 Every 2 Hours (11:22, 13:22) |
:55 Every 2 Hours (11:55, 13:55) |
| Directorates |
:30 Every 2 Hours (10.30, 12.30) |
:05 Every 2 Hours (11:05, 13:05) |
| Research Centres |
:52 Every 2 Hours (11:52, 13:52) |
:25 Every 2 Hours (12:25, 14:25) |
| Sites |
:35 Hourly (10:35, 11:35) |
:15 Hourly (11:15, 12:15) |
| Events |
:01 Every 2 Hours (10:01, 12:01) |
:45 Every 2 Hours (10:45, 12:45) |
| Elearning |
01:55 Once Daily |
:28 Once Daily (02:28) |
| China |
:50 Every 2 Hours (10:50, 12:50) |
:08 Every 2 Hours (11:08, 13:08) |
Share
|
Publishing |
current-staff |
access, cms, user, account, training |
-
How do I set a Publish Date and Time?
For each piece of content on your website, the CMS offers you the option to set a specific date and time for that content to be published live. For example, you can prepare content a few weeks or days in advance, planning its future release to the live site by creating the content, setting the required publish date and time options and then approving the content.
- Open the piece of content.
- Click on the Options tab.
- Click in the Publish date field. Today's date and time will automatically be displayed and selected.
- Alter the date and time as required.
- Update and Approve the piece of content.
Make sure you set the publish time to be at least two hours before it needs to go live. Do not set the publish time for exactly when you want the content to go live. There is no way to precisely publish a piece of content for a specific time - you have to work within the scheduled publish cycles.
For example, if you want a piece of content in the Schools channel to go live at 1pm, you need to set the publish time to be approx two hours previous to this - 11am. This is because the Schools channel publishes every two hours at 22 minutes past the hour, so you are aiming for the content to catch the 11:22am publish cycle. The content will then publish to the live site at approx noon.
Other channels, such as Research Centres, publish at different times. View the full list of scheduled publish cycles.
Share
|
Publishing |
current-staff |
publish, date, time |
-
How do I shorten my URL?
There are a number of options to shorten your URL. These are:
- Output URI field
- QUB GO Short URL Service
- URL Redirect
1. Output URI field
By default, the CMS will publish out URL's based on section names. So, if you have a really long section name, your URL will be impacted by that.
To combat this, the CMS has an Output URI field for each section.
This field allows you to create a smaller URL.
A good example is the URL https://www.qub.ac.uk/alumni/. The full Alumni section name is 'Development and Alumni Relations Office' but it has an Output URI which has shortened the URL from 'Development and Alumni Relations Office' to 'alumni'.
It is important to note that it is best to add an Output URI when you are first creating a new section. You can add an Output URI at any time, but adding an Output URI to shorten the URL on a section that has been live for a while will affect any Google links, external links or bookmarks pointing to the old URL.
Tip: The current recommended format when entering a value into the Output URI field is to use hyphens to separate words, and to use lowercase. For example, 'My Section Title', would be written in the Output URI field as 'my-section-title'. This format has benefits for readability and for Search Engine results/rankings.
2. QUB GO Short URL Service
Please note that this is not a CMS service. This service is at the discretion of the service operators.
Accessing the service
Important: Please make sure you are on the QUB VPN or using a QUB networked machine to access. Also, make sure you use your staff credentials to login). This service allows you to create short URL's.
Example Short URL: http://go.qub.ac.uk/my-short-url
3. URL Redirect
Please note that this is not a CMS service. This service is at the discretion of the service operators.
A URL redirect requires the involvement of the Web Infrastructure team to create a redirect that points to your web page. You can contact them via the Site Help Desk ticketing system.
You would need to discuss your short URL and other options with the Web Infrastructure team before this.
Share
|
Publishing |
current-staff |
shorten, url |
-
How do I remove content from the live site?
How do I remove content from the live site?
You can remove a piece of content from the live web page in two ways:
- Expire content
- Delete content
Expire Content
Expiring content means you apply a date and time to the individual piece of content using the Options tab. Once this date and time are reached, the content is removed from the live web page but it is retained within the CMS site structure with an Expired status. You can choose to publish the piece of content again at a later date if required.
To expire content:
- Open the piece of content
- Click the Options tab
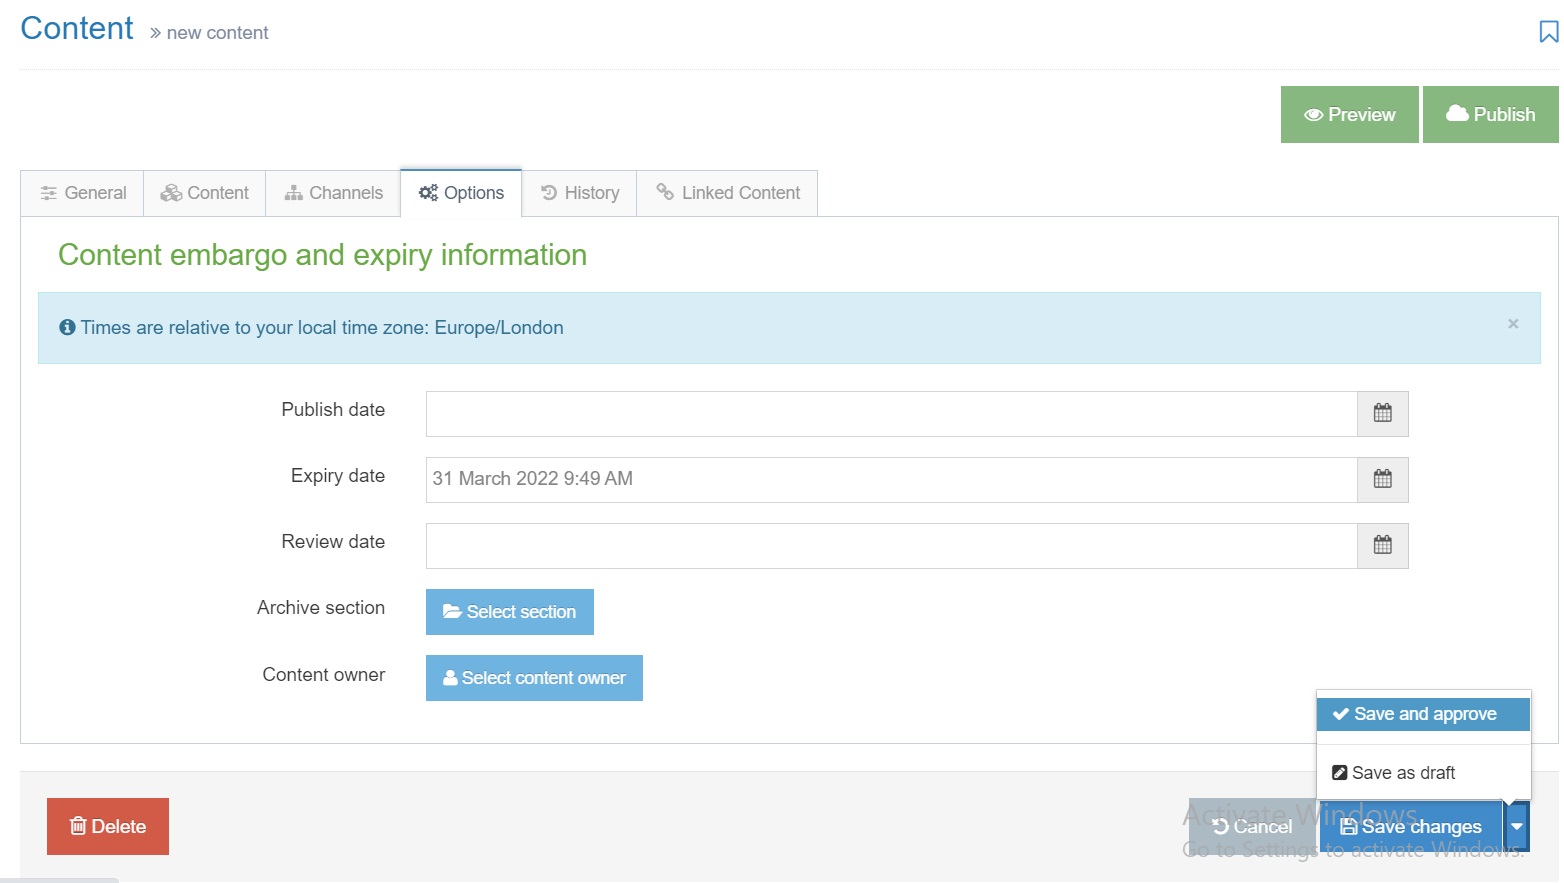
- Click in the Expiry Date field
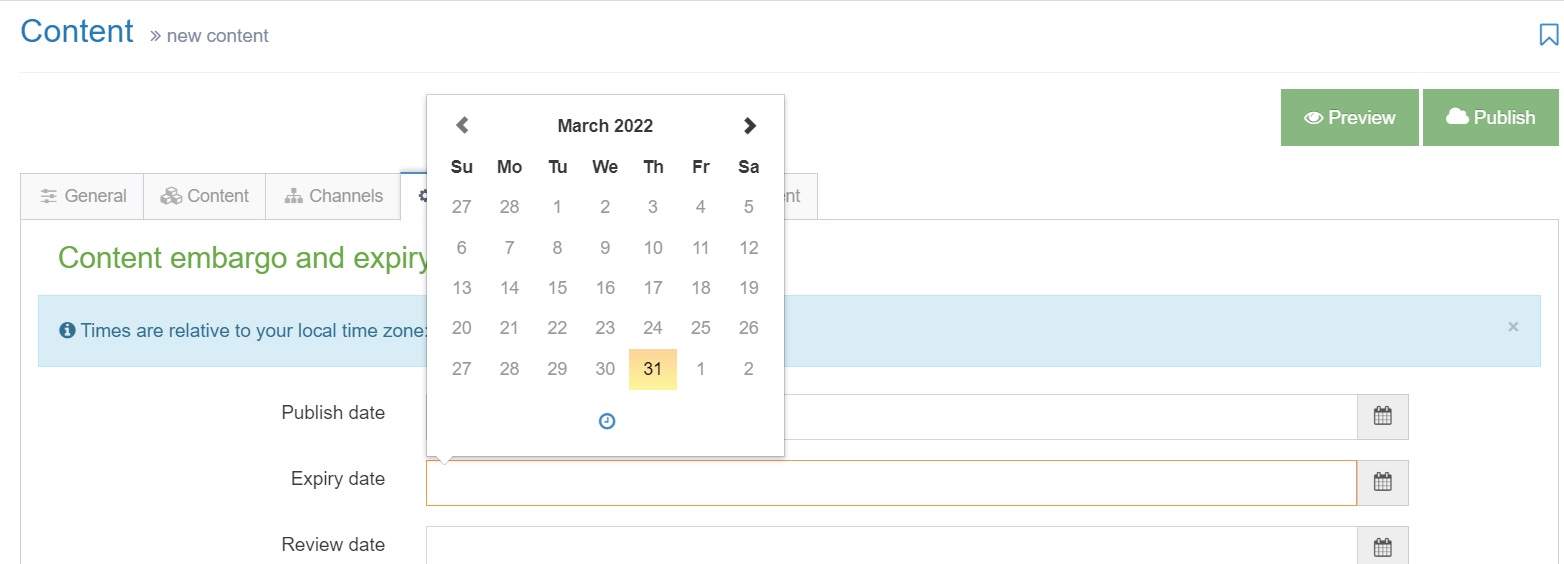
- By default, today's date and nearest time are selected (you can change this to set a different date and time, as required).
- Click Save and Approve
Delete Content
Deleting content means you are permanently removing the piece of content from both the live site and the CMS itself. When you delete a piece of content from your site structure, its status changes to Inactive and it moves to the system recycle bin. In the next publishing cycle, the deleted piece of content will be removed from the live site. The recycle bin is purged every week (usually on a Friday) and the inactive content is permanently deleted from the CMS.
- In the Site Structure screen, click on the section containing the piece of content you want to delete.
- Click on the Contents tab.
- Click the Actions menu beside the piece of content you want to delete.
- Click Delete.
- Confirm the deletion.
The status of the piece of content is now set to Inactive.
Share
|
Publishing |
current-staff |
remove, delete, content |
-
How do I remove a web page from the live site?
How do I remove a web page from the live site?
You can remove a web page (section) from the live site in two ways:
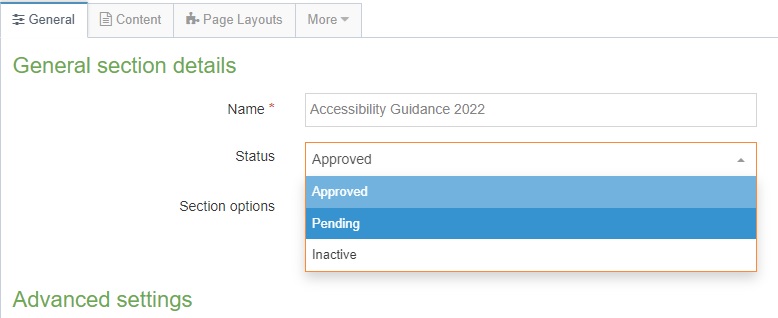
- Set the status of the page to Pending
- Set the status of the page to Inactive
Set the Status to Pending
Setting the status of a web page to pending means it will be removed from the live site but it is retained within the CMS site structure. You can choose to publish the page again at a later date if required by changing its status from Pending back to Approved.
Once the status has been changed to Pending, the page will be removed from the live site in the next publishing cycle.
- In your Site Structure screen, click on the section name
- The properties of the section under the general tab are displayed. In the Status drop-down options, click Pending.
- Click Save Changes.
Set the Status to Inactive
This means you are deleting and permanently removing the section from both the live site and the CMS itself. When you delete a section from your site structure, its status changes to Inactive and it moves to the system recycle bin. In the next publishing cycle, the deleted section will be removed from the live site. The recycle bin is purged every week (usually on a Friday) and the inactive section is permanently deleted from the CMS.
- Click the Actions menu beside the section you want to delete.
- Click Delete Section
- Confirm the deletion
The status of the section is now set to Inactive.
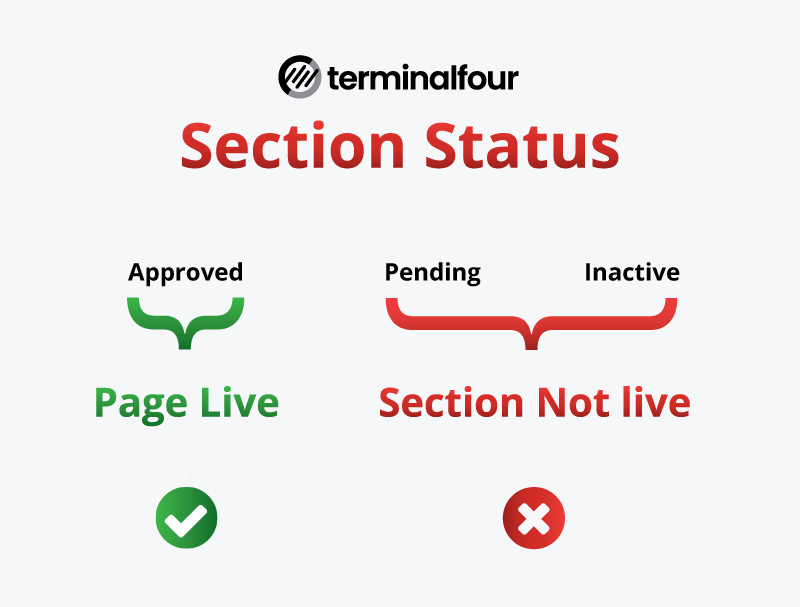
Section Status Infographic showing that Approved sections go live, Pending and Inactive do not go live.
Share
|
Publishing |
current-staff |
remove, delete, page, section, webpage |