How to map a network drive in windows 10
Sometimes your connection to the Q drive can stop working.
If you're working remotely, first check your Always-on VPN is connected properly.
Then, follow the steps below to re-map the network drive.
The steps below relate to Windows 10. For Windows 11 please follow the link at the bottom of this page.
Mac users are advised to request Citrix. To do so, please email the IT Service Desk.
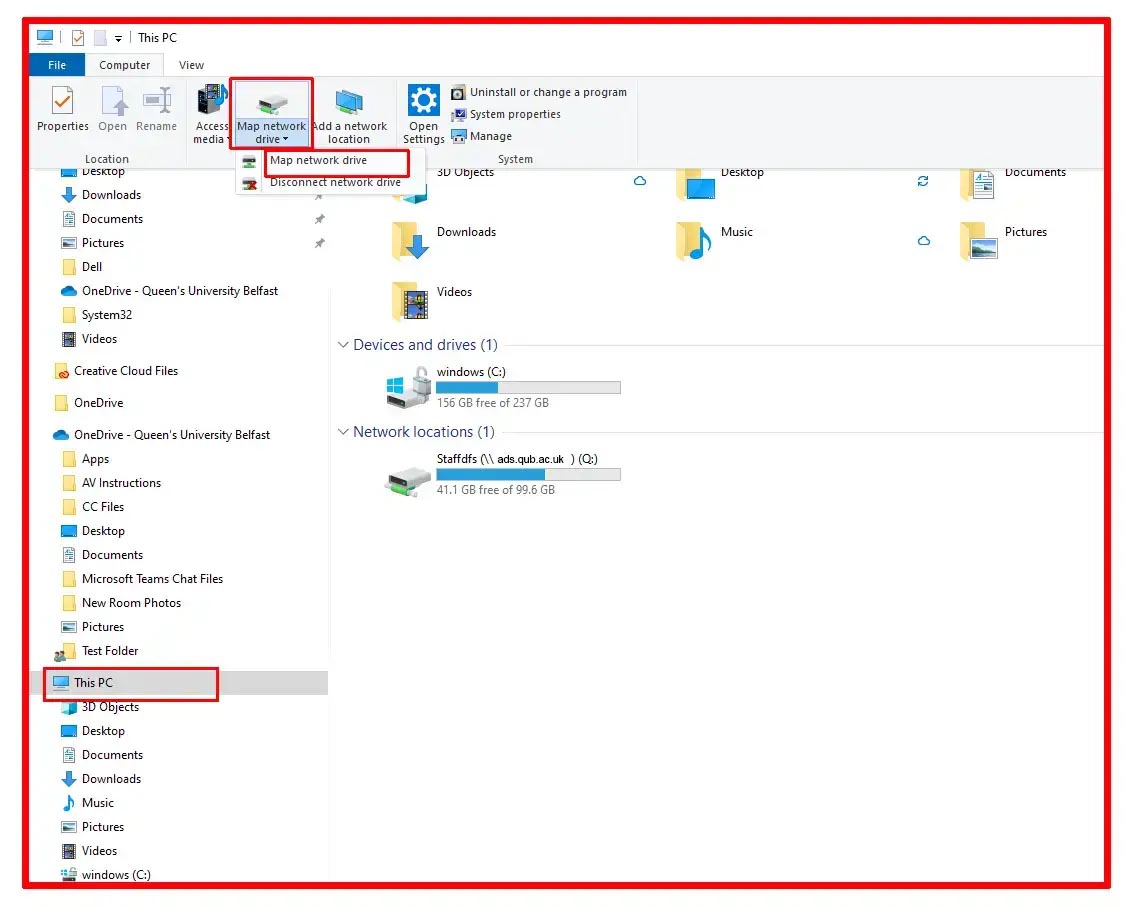
Step 1
To map the drive, open File Explorer and select This PC by clicking on it once. Click on the Computer tab at the top of the page
and then select Map Network Drive and select Map Network Drive again.
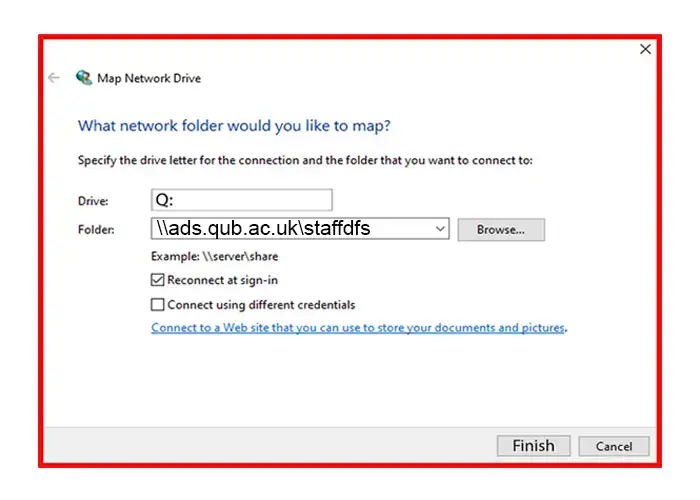
Step 2
In the window that opens, change the Drive letter to Q:
Then enter the following into the box labelled Folder:
\\ads.qub.ac.uk\staffdfs
Click Finish
If you select This PC you should also be able to see the Network Location
StaffDFS (\\ads.qub.ac.uk) (Q:)
For Windows 11 Computers Click here
If you still cannot connect to the shared drive, contact your school IT officer, or, if you don't have an IT officer, please contact IT services.